How To Run an External Asset Scan with Tenable.io in Just Four Lines of Python

The new Python SDK for Tenable.io™ was designed to easily enable powerful integrations with the Tenable.io API. The aim of this blog is to demonstrate how to get the SDK up and running, launch an external network scan against one of your publicly exposed assets, then export the results in a convenient PDF file in only four lines of Python.
The SDK is designed to easily enable powerful integrations with the Tenable.io API
Tenable.io account setup
If you don’t already have an account, the first thing you’ll need to do is create an account on Tenable.io. Tenable offers a free 60 day evaluation of the platform. Once you’ve completed the form, you’ll receive an email that will allow you to finish setting up your evaluation account.
Generating API keys
Once you have an account on Tenable.io, you need to generate API keys for your account.
- Log into your Tenable.io account.
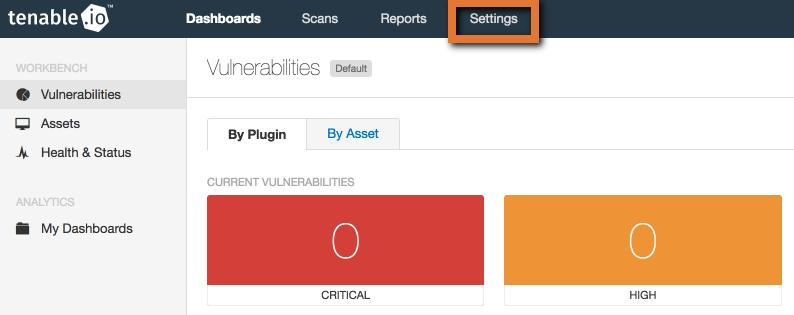
- On the top menu bar, click Settings.
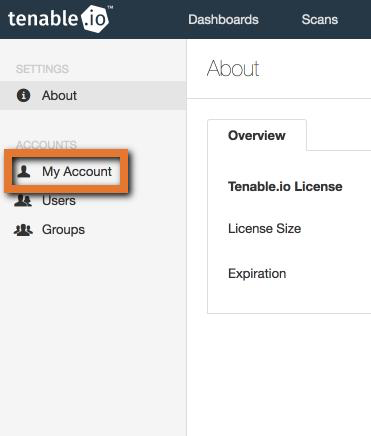
- From the Settings page, click My Account from the menu on the left side of the page.
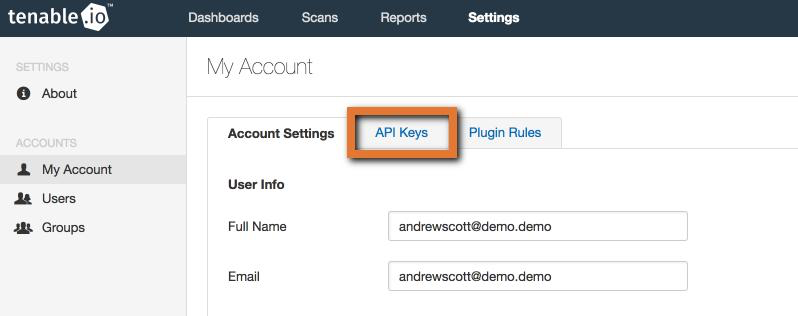
- Click the API Keys tab.
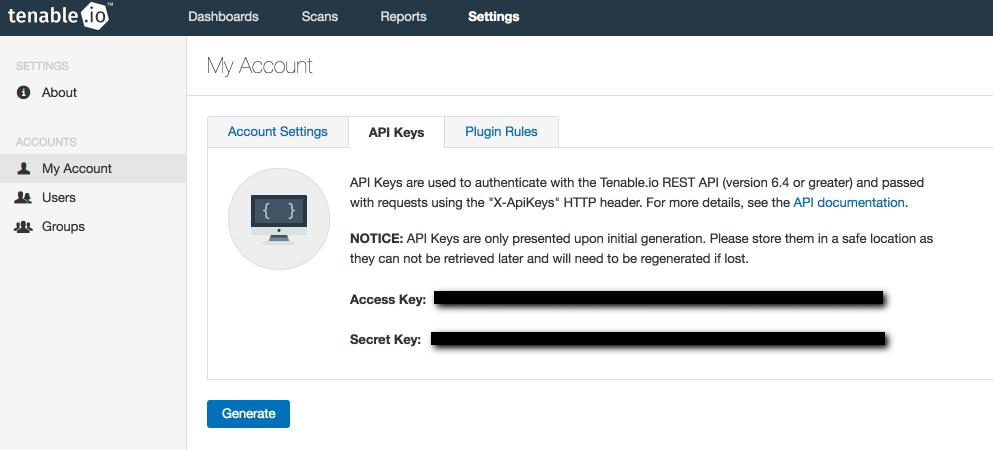
- Click the Generate button.
- Store these keys somewhere safe; you’ll need them to access the API using the SDK.
Setting up a development environment (optional)
This step is not strictly required, but it is highly recommended. A virtual environment will keep your development work with the Tenable.io SDK in its own separate environment and free from any other Python packages or dependencies. For this blog, Python 3 is used, but Python version 2.7+ is also supported.
- On Unix/MacOS (Windows blog coming soon), open a new Bash shell.
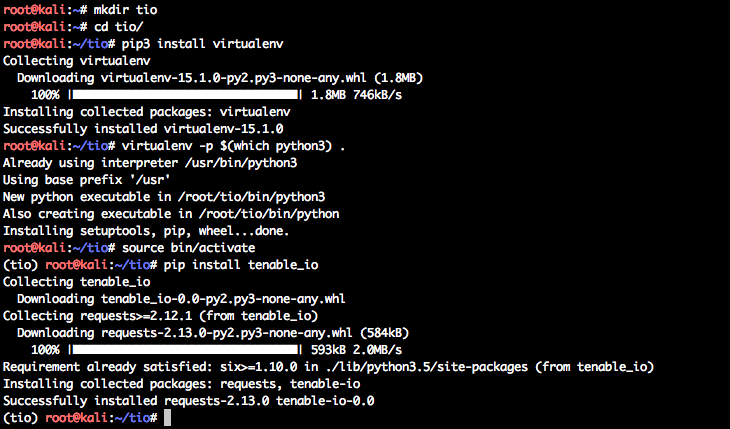
- Create a new directory for your development work:
$ mkdir tio - Navigate into your new directory:
$ cd tio - Install virtualenv if you have not already done so:
$pip3 install virtualenv - Create a new virtual environment:
$ virtualenv -p $(which python3) . - Activate your virtual environment:
$ source bin/activate - Installing the SDK itself can be done with a single command:
$ pip install tenable_io
Installing the SDK itself can be done with a single command
The code
from tenable_io.client import TenableIOClient

client = TenableIOClient(access_key='{YOUR ACCESS KEY}', secret_key='{YOUR SECRET KEY}')
scan = client.scan_helper.create(name='{MY TEST SCAN}', text_targets='{YOUR TARGET}', template='basic')
scan.launch().download('{SCAN NAME}.pdf', scan.histories()[0].history_id) NOTE: Be sure to fill in the variables wrapped in curly brackets above with your own information.
Here is an explanation of what is happening line by line.
from tenable_io.client import TenableIOClientLine 1 imports the TenableIOClient class from the tenable_io client module. The client is the simplest way to interact with the Tenable.io API and provides methods for doing anything you can do via the Tenable.io Web Application interface, and much more.
client = TenableIOClient(access_key='{YOUR ACCESS KEY}', secret_key='{YOUR SECRET KEY}')Line 2 instantiates a TenableIOClient object with your API keys, giving it access to your Tenable.io account. Note, the SDK will only operate fully/correctly if an Admin level account is used for authorization.
scan = client.scan_helper.create(name='{MY TEST SCAN}', text_targets='{YOUR TARGET}', template='basic')Line 3 creates a new Tenable Basic Network Nessus® scan against the domain name or IP supplied in the text_target field. You may also supply a comma-delimited list as a string in this field to scan multiple targets.
NOTE: Per the EULA, you are only permitted to scan targets that you own and are authorized to scan.
scan.launch().download('{Scan Name}.pdf', scan.histories()[0].history_id)Line 4 is where the magic happens:
scan.launch()launches the scan you created on line 3 using the Tenable.io US Cloud Scanners, which can be utilized for scanning your public facing assets.histories()[0].history_idis being passed as a parameter to thedownload()function. This will resolve to thehistory idof the scan you just launched; because the scan has only been run once, it will grab the only history id.- The
download()function takes as parameters thehistory idmentioned above as well as the name you give to the scan result that will be downloaded. Make sure you give the file a name that ends in .pdf as the default format for downloading scan results.
Running the script
Copy the code along with your alterations to a file named public_scan_tutorial.py and save it in the tio/ directory. Then, to run your scan:
$ python public_scan_tutorial.pyThis command should take a few minutes to run as it creates your scan, scans your target, and exports the results. After it finishes, you should see a new pdf file in the tio/ directory.
Wrapping up
Not only is the Tenable.io SDK incredibly powerful and concise, but it’s also extremely easy to use while giving you greater control and flexibility over your company’s threat and vulnerability management. This article is only the tip of the iceberg; check out the SDK documentation and subscribe to The Tenable Blog for additional tips and articles in the future.
For more information
- Tenable.io free 60-day evaluation
- Tenable.io SDK for Python
- Virtual Environments
- Python
- Tenable.io Dev space in the Tenable Community
- Tenable Vulnerability Management
- Vulnerability Scanning
